We recently posted our LCG Slash 4×4 shootout. This shootout consisted of us taking three stock Traxxas Slash 4×4’s, and slapping on three different LCG chassis to see which one would come out on top. These were all built using the stock electronics, stock suspension, and stock bodies. It showed what you could do by taking an otherwise stock Traxxas Slash 4×4 and slapping on one of the top 3 LCG chassis on the market today. But that was just the first step. Many people who pick up these chassis simply slap on the stock gear and run them like that at first. Then over time they swap the various stock parts out in favor of better performing components. And that’s what we’re doing too.
The three trucks have taken three very different turns. Each one is being upgraded independently of each other. Meaning after the upgrades are complete, we won’t be holding another shootout to pin them against each other. The primary issue is time. It takes a lot of coordination to get all those people together in the same place at the same time. Then take into account that we all have full time jobs, families, and a host of other obligations and you realize how difficult a task it is.
Instead, we are going to independently upgrade each truck and document their performance gains. This article will focus on the Stage II upgrades I performed on the SSC Slash 4×4.
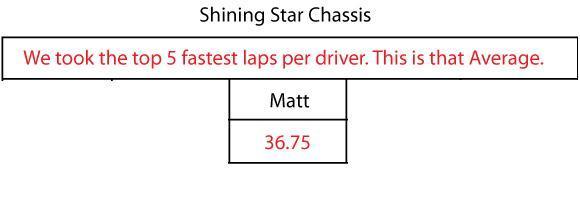
First up lets remind everyone the performance I had with the SSC chassis and all of the stock Traxxas gear.
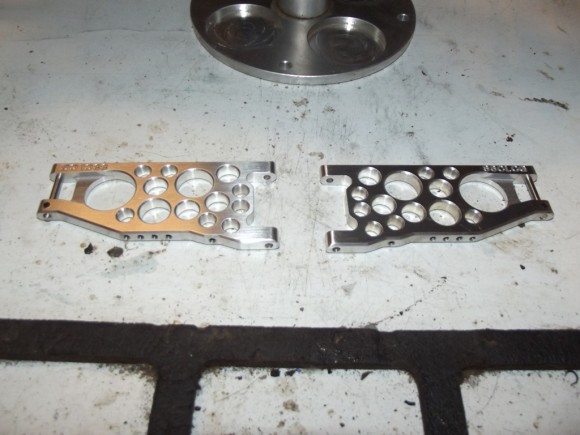
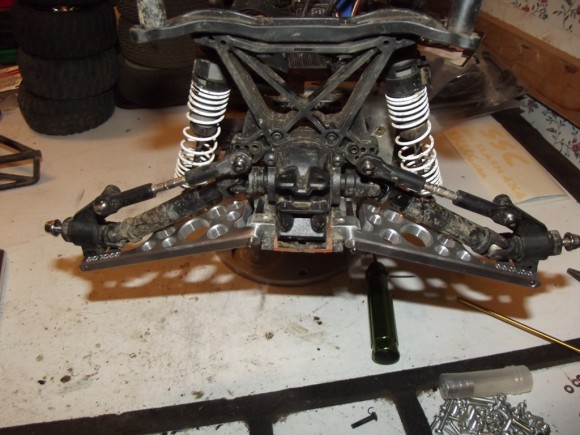
 For Stage II, I added just a couple of things. First up are SSC’s long wheelbase arms. These arms are CNCed out of aluminum, and are super lightweight. I weighed the truck after all of the Stage II modifications were complete, and we are at 5.96 lbs, less than one ounce lighter than we were with the stock rear arms and stock electronics. These extend the wheelbase from the stock 12.75″ to 13.1″.
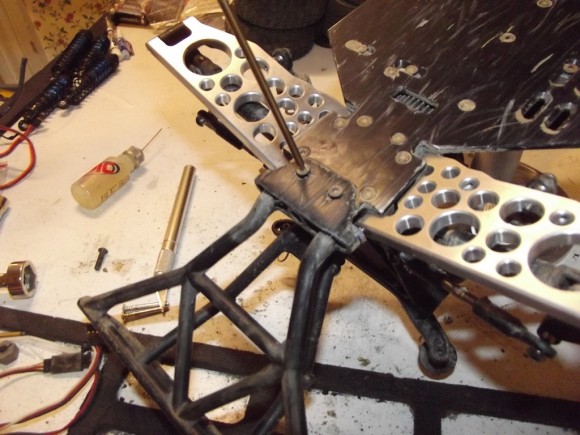
The arms are really easy to put on. We start by removing the rear bumper.
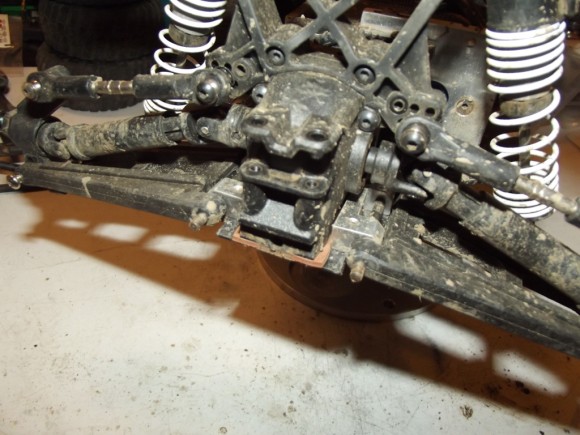
With the bumper out of the way we remove the blue aluminum block that holds the hinge pins in line.
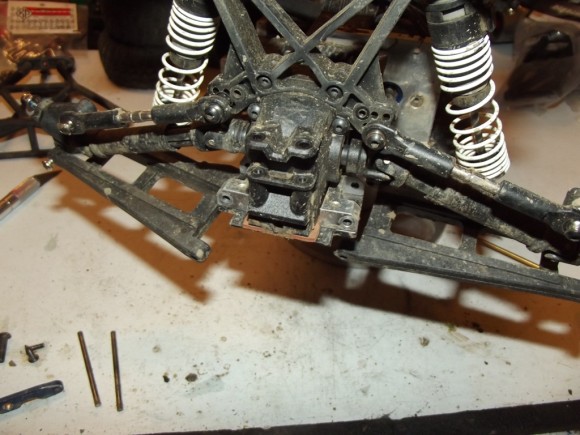
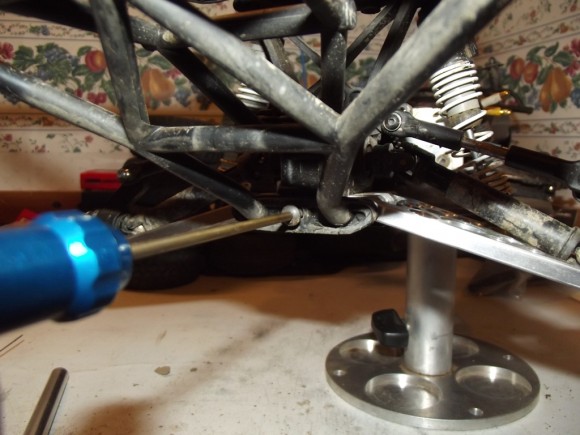
Pull out the hinge pins to release the rear arms from the chassis
Remove the hub carrier hinge pin, and the lower shock screws. The old arms come right off. Then we’ll slide the extend-a-base arms over the blocks and slide in the hinge pins
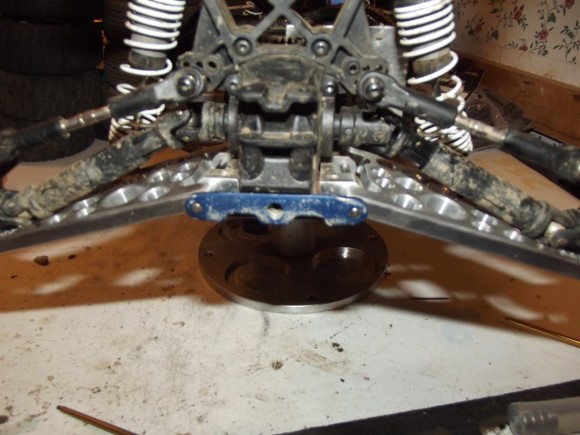
Now we can reinstall the hinge pin retainer, and the rear bumper
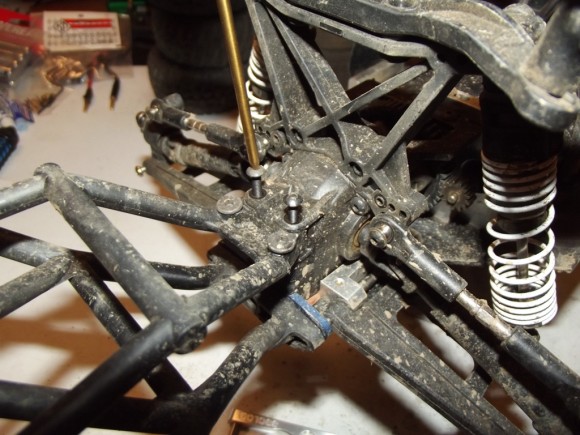
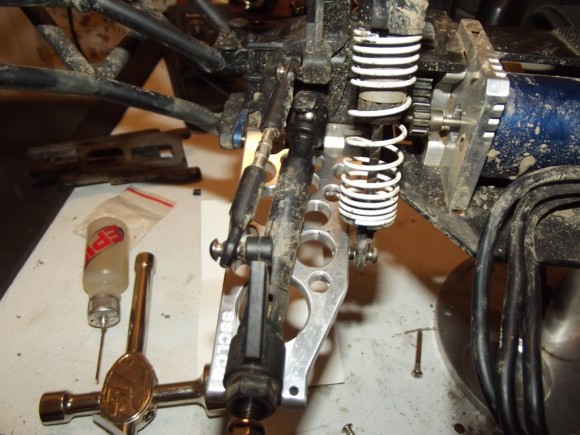
On the stock arms, the camber links went to the back of the hub carrier. You can see here though how much the hub carrier moves back with these arms. I moved the camber link to the front of the hub carrier so its not as drastic an angle. At this point we’ll also install the new hinge pins that came with the arms for the rear hub carriers, along with their associated grub screws. You can also reattach the lower shocks to the new arms.
Pages: 1 2


 August 6th, 2012
  Matt
Matt 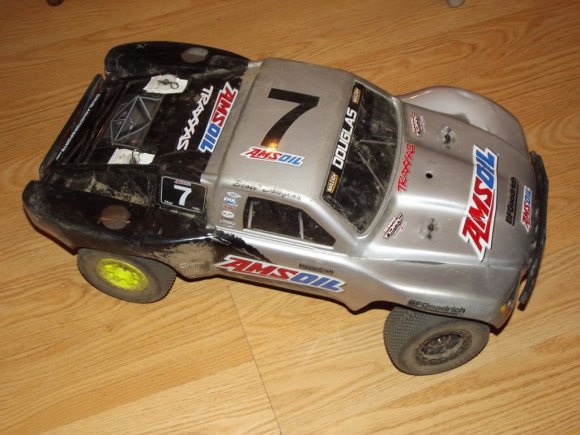
 Posted in
  Tags:
Tags:
[…] Re: ssc-lcg finally! Stage II of the SSC Slash 4×4 is up. Check it out. SSC Slash Stage II upgrades | RC Soup […]
[…] Re: LCG Comparison – very cool read!!! Stage II of the SSC is posted. Check it out! SSC Slash Stage II upgrades | RC Soup […]
[…] II of the SSC Slash is posted. Enjoy http://www.rcsoup.com/2012/08/ssc-sl…e-ii-upgrades/ __________________ http://www.rcsoup.com- R/C Reviews, News, and Tips <<- PM Me if you'd like us […]
[…] by saying that Stage II of the SSC chassis upgrades are complete, and the results can be seen here. __________________ http://www.rcsoup.com- R/C Reviews, News, and Tips <<- PM Me if you'd like […]
[…] already went thru the Stage II upgrades. You can read all about them HERE. Just like with the initial shootout, we took all of the laps and averaged the top 5.This was our […]